Ok, new rubber key contact strips installed and works an absolute charm. This tutorial shows the middle octave being maintained.
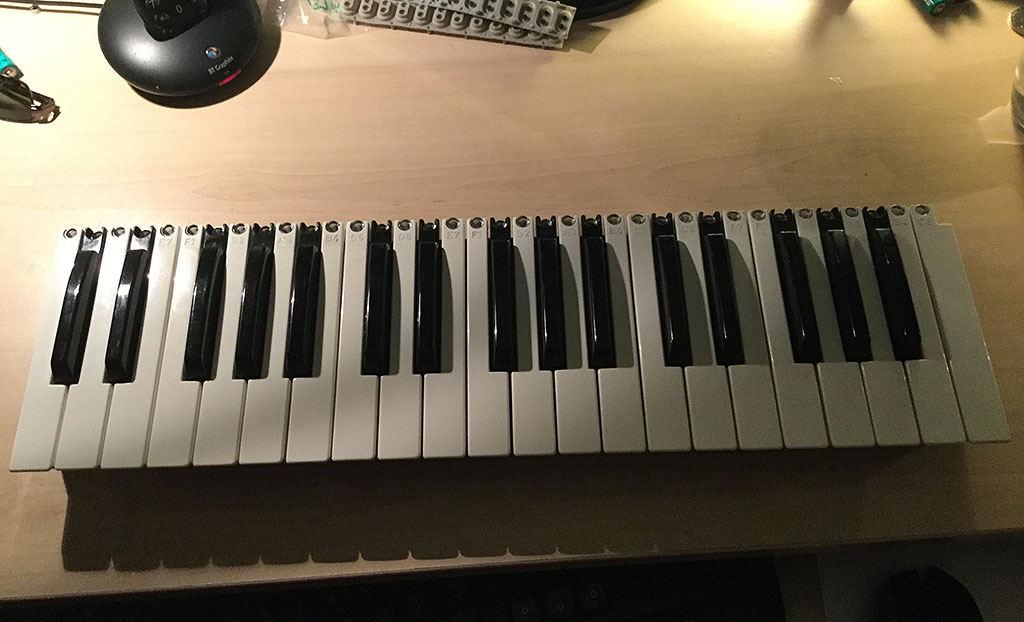
^ Indigo keybed removed from Indigo (see one of my earlier pics toward the top of thread for this procedure).
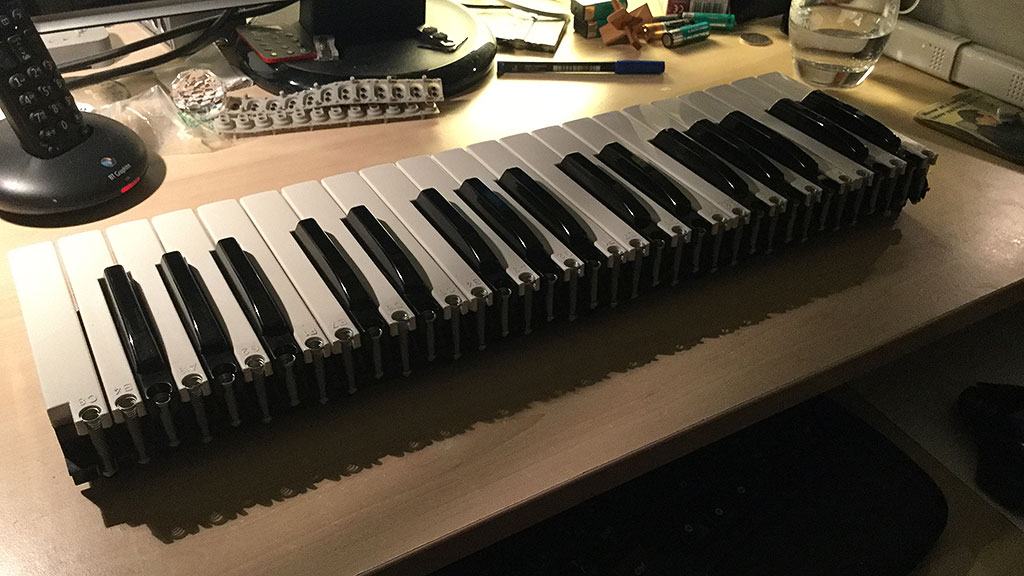
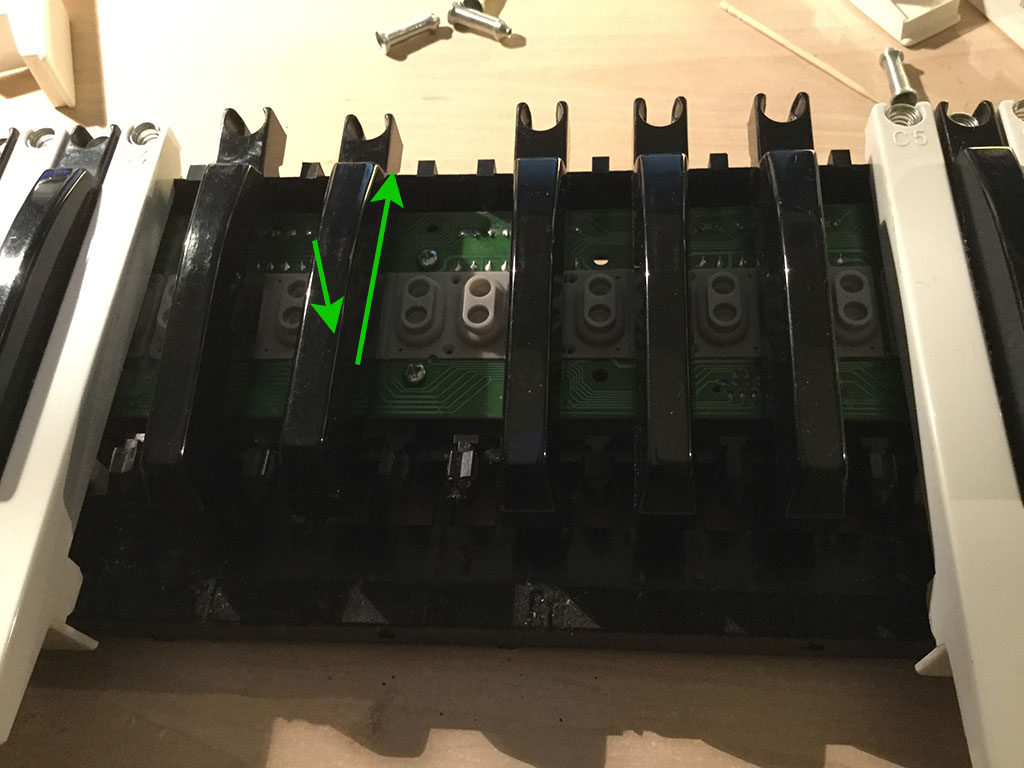
^ Rear of keybed showing key springs.
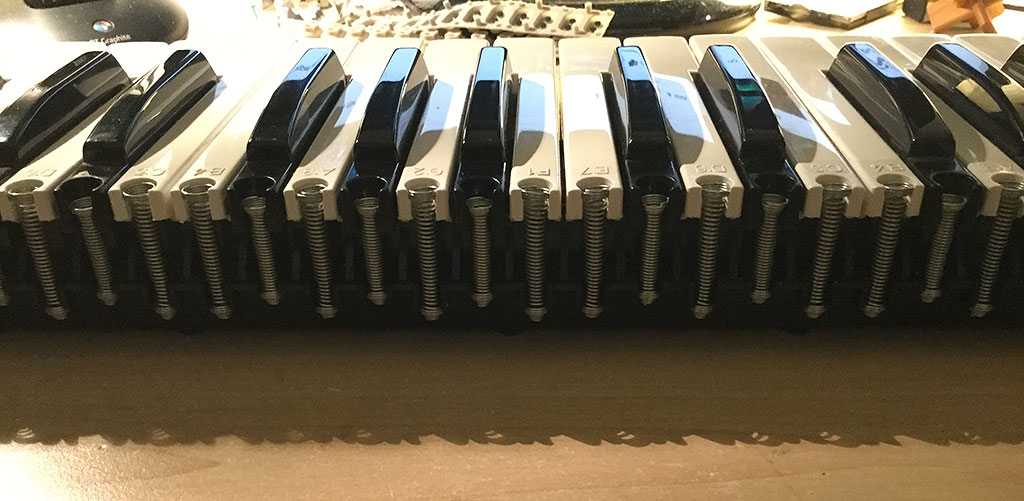
^ Close-up of rear springs.
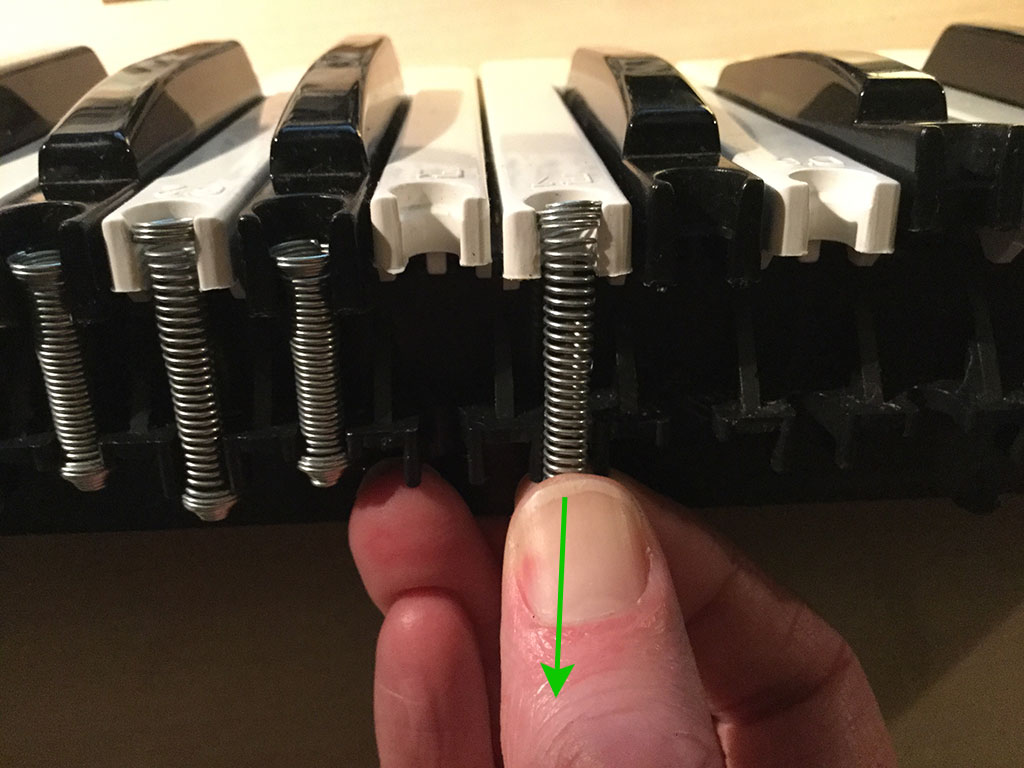
^ Just pull on the bottom of the spring(s) and then out, simples.
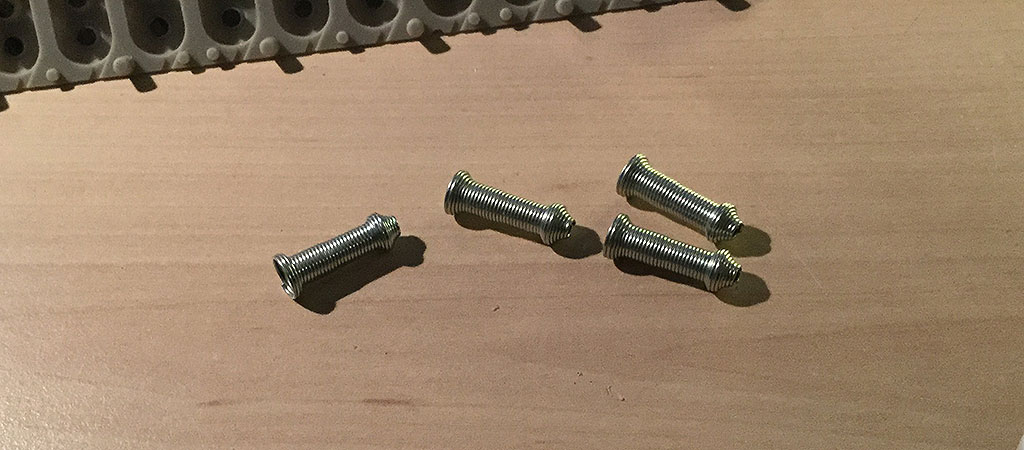
^ Incredibly phallic-looking springs they are too.
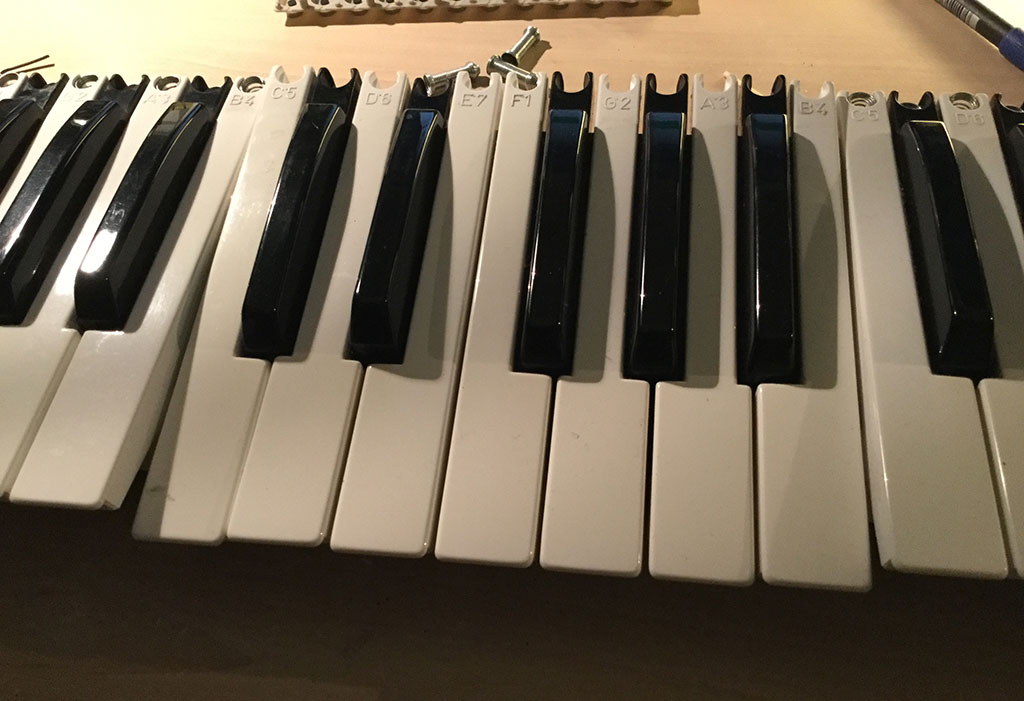
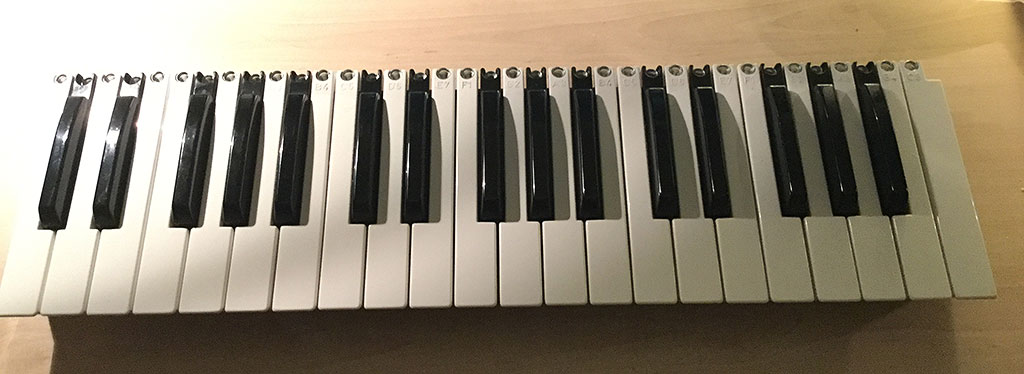
^ Without any springs, the keys just flop down. They can be removed by pulling them toward you. I found it best to remove all the white keys first.

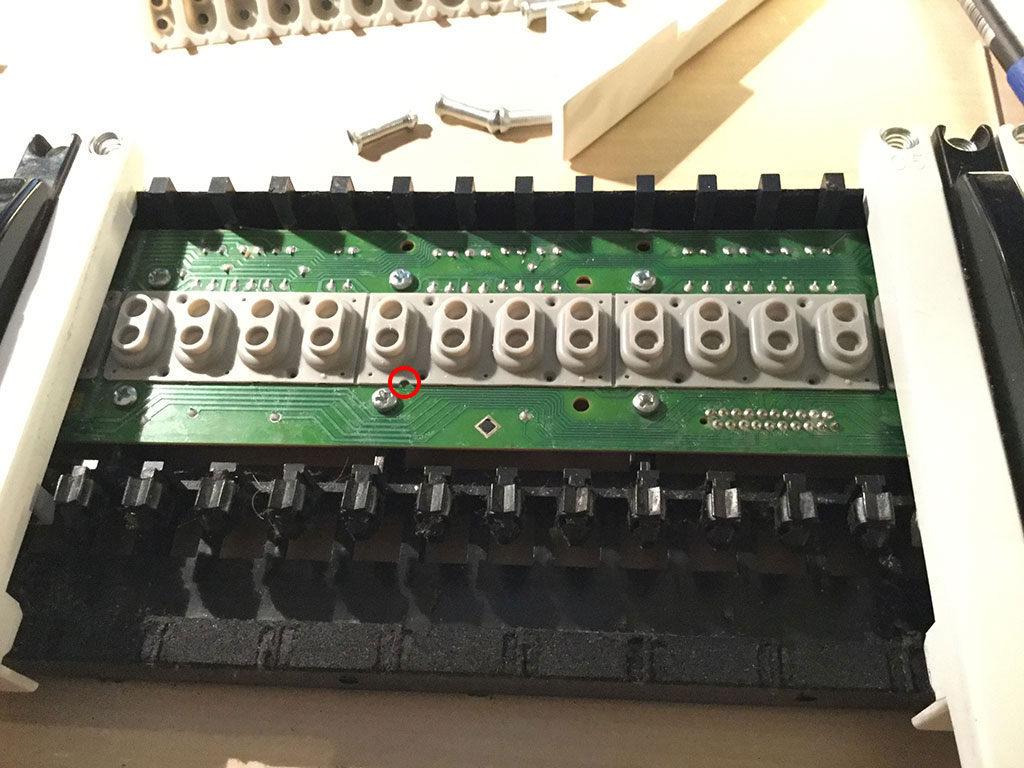
^ Shows the underlying silicon rubber contact strip(s). They come in octave lengths. You can simply pull one or more of the strips off. I will be removing the strip for the middle octave in the above pic, in order to get to the aforementioned problematic key in that region.
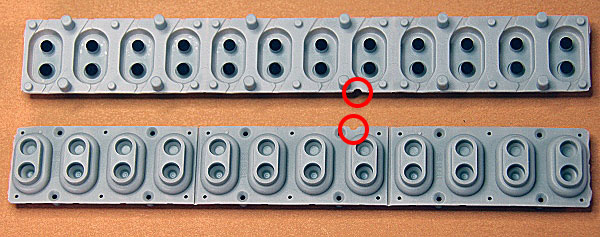
^ Shows the top and underside of the contact strips. They come in 12-key (one octave) or 13-key (for one octave and 1 additional key for top-C) versions. Notice the little notch scooped out along one of the edges (circled), this is so you can locate which direction the strips should be installed. Also notice the countless little rubber legs on the underside.
If you're merely maintaining the rubber strips, you can wash them with clean water (no detergent) before drying thoroughly, ensuring there is no further foreign debris or fibres on them or the black contacts on the underside, and then replacing them.
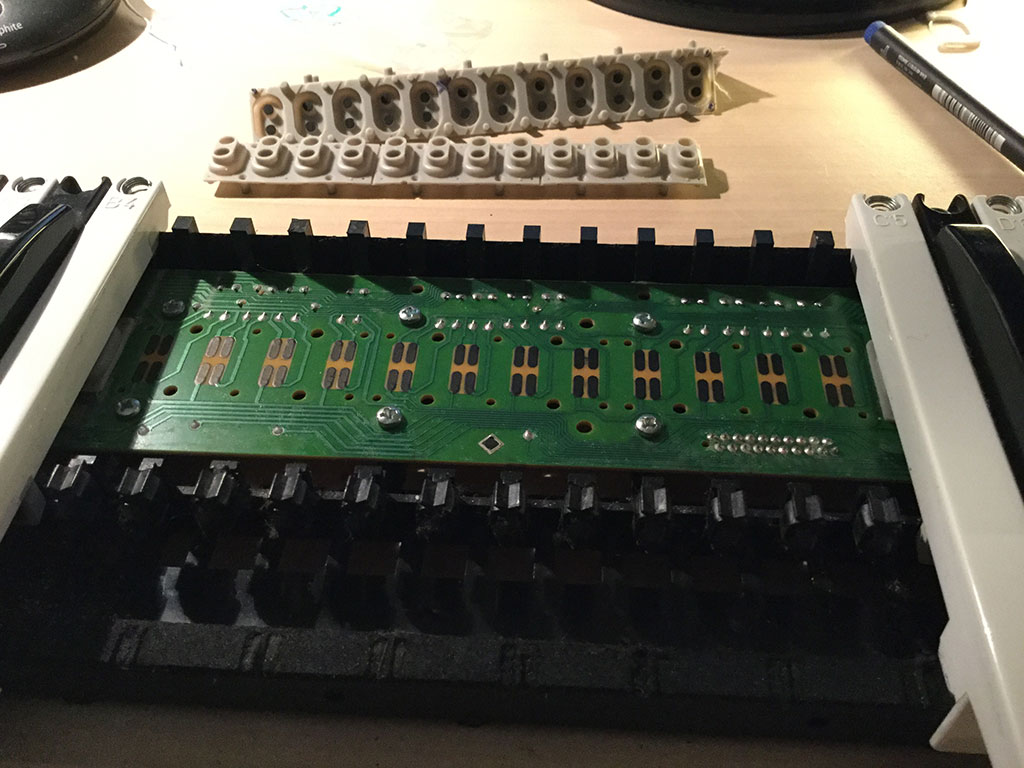
^ Shows the bare carbon contacts on the Virus PCB after the rubber strip has been pulled off.
Important: Make sure they're clean and free from any debris that could otherwise impede the contacts from the rubber strip. All it takes is for a crumb or speck of dust to prevent the key from being triggered.
Make sure when you place the new or cleaned rubber strip, the 'notch' faces the bottom. This is important as the carbon contacts under the rubber strip are at slightly different heights - I'm guessing the mechanics are that one of the two rubber contact hits the PCB before the other one, as you press a key, and it uses this to calculate the 'velocity' by doing so.

^ Align the new contact strips, and use a toothpick to poke all the rubber legs through the PCB. Really easy. Make sure all of them have been pushed through so the rubber strip is fully flat against the PCB, and obviously don't push ridiculously hard.
^ Once the key strip is installed you need to slot the keys back on. Install the black keys first, followed by the white keys.
^ Then simply re-hook all the springs at the rear, they're super easy. Doesn't matter which springs are used for which type of key (white vs black).
^ Voila! All that remains is you reverse the procedure to install the keybed back into the Virus. Basically insert the keybed back into the keyboard chassis, hook up the ribbon connector again, and then screw the keybed into the chassis.
Hope this may help others carry out inexpensive maintenance.
If you are removing old strips and re-installing new ones, each strip cost me approximately £6 per 1-octave strip, plus P&P. The strips in question are also seemingly used on many other synths, such as Korg, Ketron, Roland, Kurzweil and Nords. You can get them from
http://synthesizerservice.de but I got mine from the user "
specialparts2012" (Turkish seller) on Ebay, which were slightly cheaper than SynthesizerService and I'd ordered them before SynthesizerService got back to me, but they may well be available elsewhere too. Be careful to obtain the correct ones as there are differing types of octave strips out there.
~Timo